Posting pictures is very easy. Images are added as attachments to a new post or can be added when editing an existing post. Before adding your images resize them with your photo editor to be no greater than 640 in height or width! When a image does not fit your web view or the space the server allots for an image, scroll bars appear at the bottom and/or right side of the image. These bars are manipulated to view the entire image.
Comments are allowed with each image and will appear at the bottom of each image. This tutorial uses the comment boxes to describe uploading an attachment with each appropriate image.
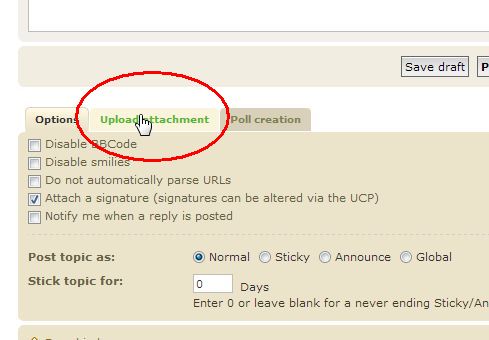
While working in the draft editor, select "Upload Attachment".
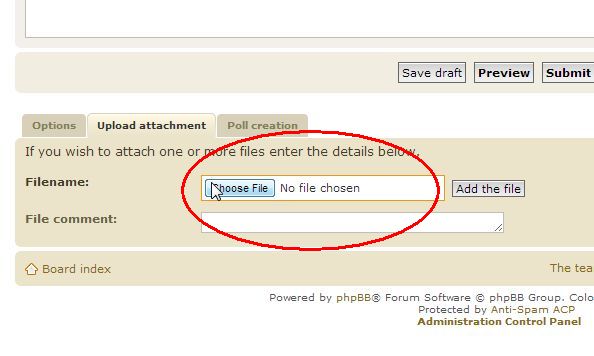
"Choose File" will open a file browser box. Use the appropriate icons to navigation to the directory containing the file(s) you would like to attach. The attachments must be on your computer.
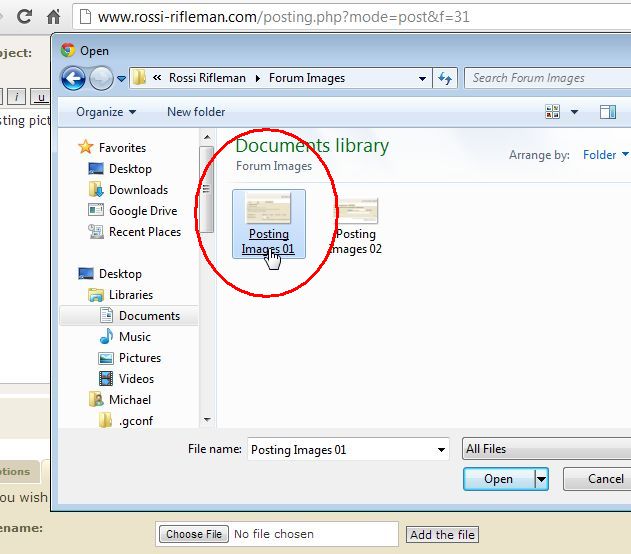
Select the image with your mouse.
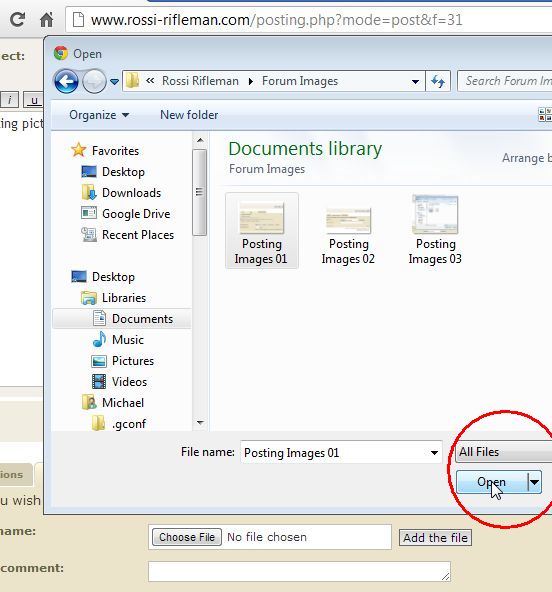
Click on "Save". Don't forget to use the scroll bars to view images!
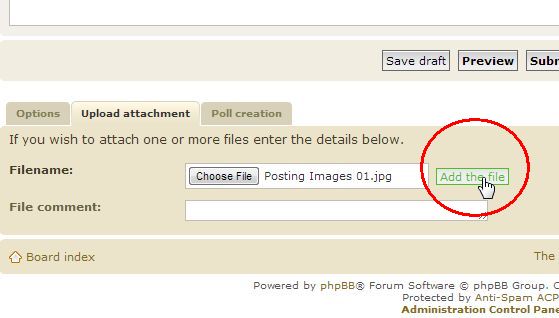
The File Selection Box will close. Click on "Add This File".
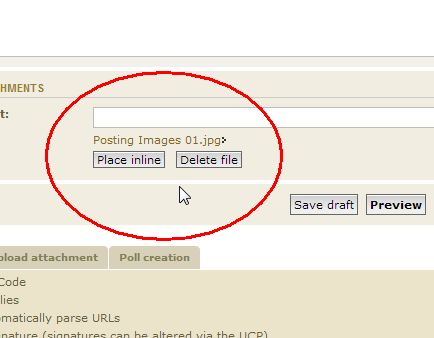
Once the file is uploaded to the Rossi-Rifleman server, the progress is displayed in the lower left had corner of your browser, you will see the file posted in the draft display. Left alone, the attachment will be displayed at the bottom of your post.
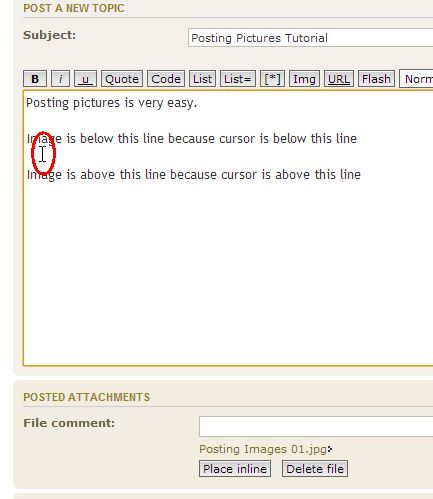
The attachment can be placed "inline" by position your cursor where you would like the attachment to appear. Don't forget to use the scroll bars to view images!
Once the cursor is positioned, select "Place Inline". In this example the cursor has been positioned between the two lines of text.
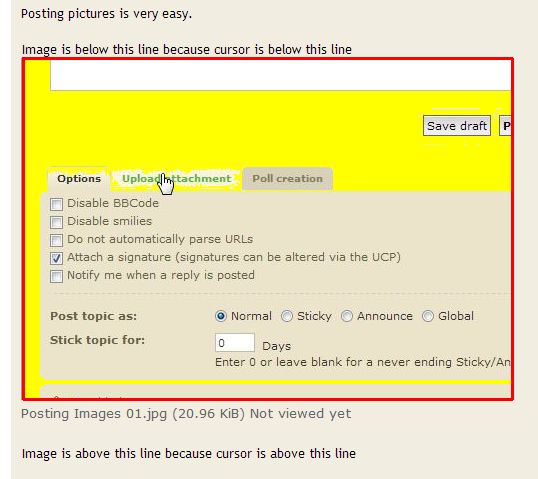
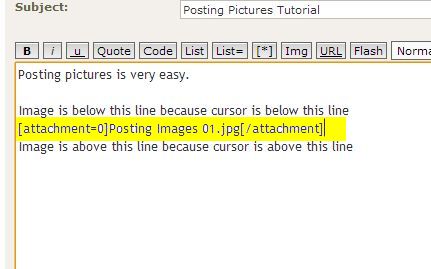
In the example above, the image (bounded by a red outline and highlighted with yellow, has been added between the two text lines. Don't forget to use the scroll bars to view images!
Your attachments are cataloged and can be managed in your "User Control Panel".
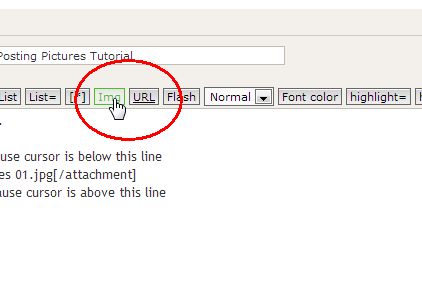
This tutorial applies only to uploading attachments to the Rossi-Rifleman server. Use of the PHPBB IMG code is for inserting an URL for an image that is posted elsewhere on the web.
Posting Pictures Tutorial
- Ranch Dog
- Site Admin
- Posts: 9399
- Joined: 23 Jan 2012 07:44
- Location: Inez, TX
- Has thanked: 1838 times
- Been thanked: 2281 times
- pricedo
- 2000 Shots
- Posts: 2509
- Joined: 31 Jan 2012 10:36
- Location: Dual Citizen (United States & Canada)
- Has thanked: 56 times
- Been thanked: 234 times
Re: Posting Pictures Tutorial
OR
Upload the photos to Photobucket and imbed the URL/IMG in the post body.
The problem with using Photobucket is that when the photos expire the tag leaves an ugly "scar" in place of the image in the respective post on the host message board.
I would go with the attachment process as per RDs walk-through on this thread.
LIFE MEMBER - NRA & GOA
- akuser47
- Founding Member
- Posts: 5070
- Joined: 12 Feb 2012 11:43
- Location: ohio
- Has thanked: 1266 times
- Been thanked: 482 times
- 357cyrus
- Posts: 104
- Joined: 07 Jan 2013 03:19
- Location: North Central Ohio 44880
- Has thanked: 12 times
- Been thanked: 14 times
- Ranch Dog
- Site Admin
- Posts: 9399
- Joined: 23 Jan 2012 07:44
- Location: Inez, TX
- Has thanked: 1838 times
- Been thanked: 2281 times
Re: Posting Pictures Tutorial
I took a screen shot of the the web page and saved it as an image. Most photo shop software can do this or other applications. One great, free, program is Irfranview.357cyrus wrote:how do you make an attachment from a web page like you did here?
viewtopic.php?f=9&p=6862#p6862
Michael