

Well, I don't digress too much as I think age played into the my trigger guard snapping when I dropped the stockless receiver on the work bench. That was a bummer as the rifle was only a couple of days old. In a nutshell, all of the clockworks inside the Single Shot rifles are "restricted" parts and the rifles must be returned for repair. That was going to happen so I JB Welded the crack and continued to shoot the rifle.
In the meantime, I setup so email notifications on eBay and durned if a parted out Single Shot didn't appear. I bought all the parts. I've just been waiting to do some research on taking the thing apart but could find about zero on doing it. So with noting in had except the Owner's Handbook and a set of punches, I went to work.
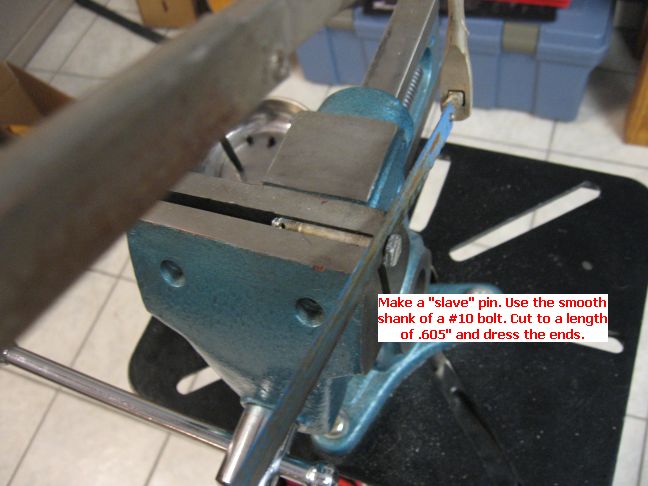
The absolute first thing I wanted to do was to make a "slave" pin that I could knock through the Trigger Guard Assembly as I knocked the Receiver Assembly Pin out. Luckily I had the replacement Guard in hand so finding the material was easy. Use the smooth shank on a #10 bolt, cut it and dress it to .605".
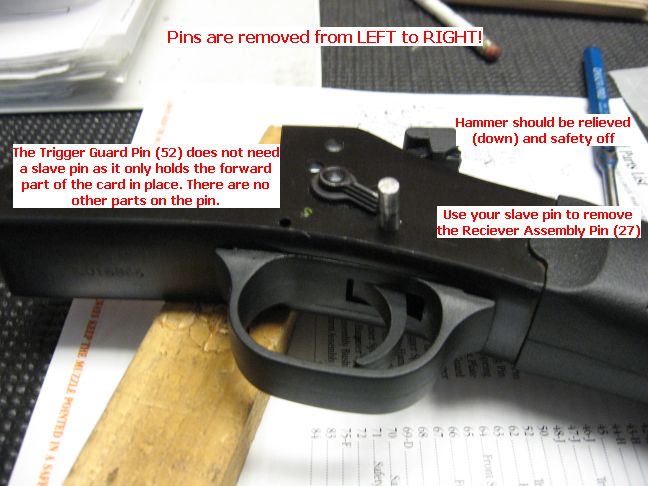
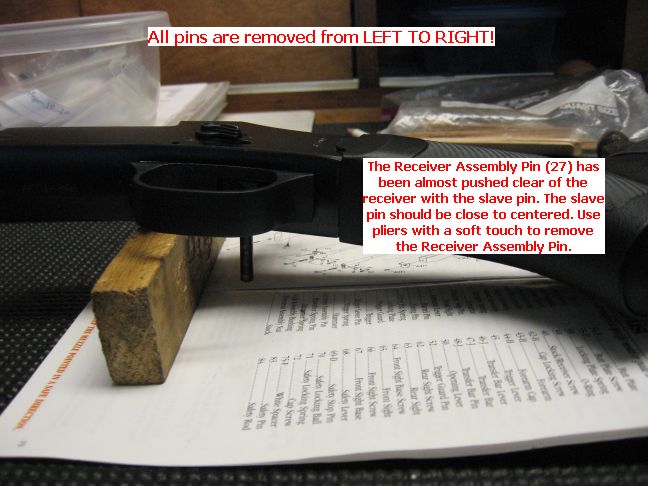
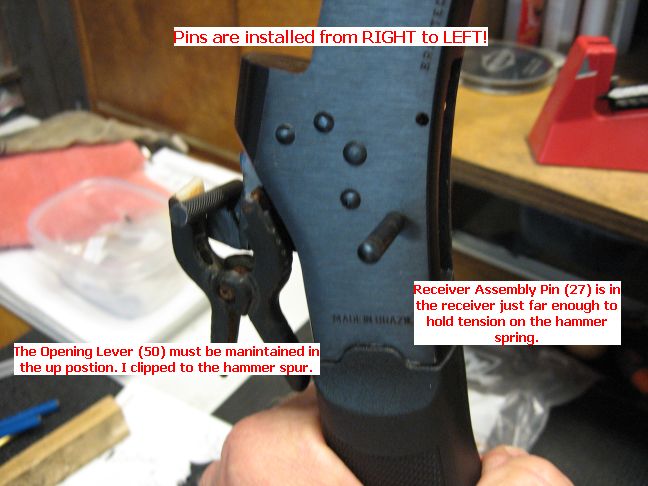
I took some wild guesses and it all worked out. I figured the hammer needed to be down, the safety off, and that the pins would punch out from left to right. Yeap, all good guesses.
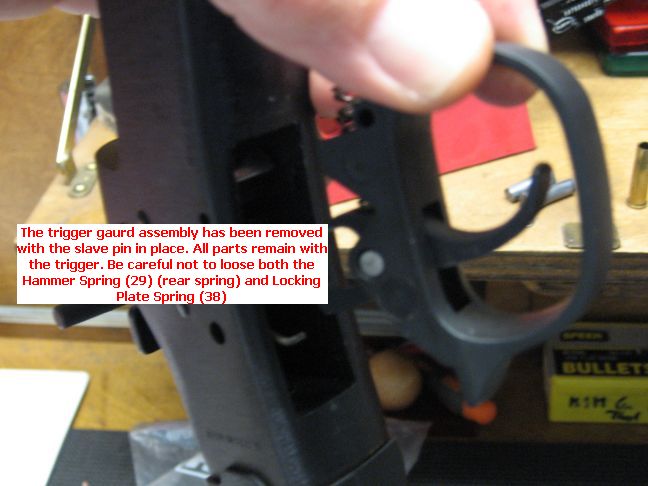
Don't quite knock the Assembly Pin clear as the slave pin is slightly smaller in diameter and might jump through the receiver with it. Pull the Assembly Pin out when it gets close and then center the slave pin within the Trigger Guard Assembly. This work like a champ!
Both the Locking Plate and Hammer Springs didn't jump out of the Guard Assembly because they were locked in old dry grease despite the cleaner I blew through the receiver. There is a chance that they could jump so be careful.
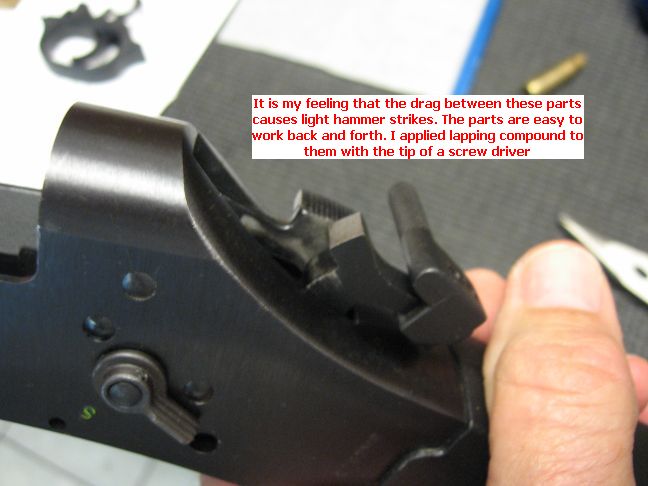
One thing that I wanted to investigate was some light primer strikes I've experienced despite the work I did to the hammer nose in another post. That work took care of about 95% of the issue I was experiencing but I need the rifle at 100 percent. All of the light strikes have been with CCI primers. I found some speculation on what might fix it online but I found no one that actually reported on their work and documented the fix. I plan to do this one way or the other.
What I observed is that there is quite a bit of drag between the surfaces of the Hammer and the Extraction Lever where they mate. One post I read talked about maybe placing a small washer between the two but from being down in the parts I can tell you there is no room for any type of washer. The parts are dragging against each other because there is no room.
Using Clover fine lapping compound, I kept a constant coat of compound between the two parts and after 250 complete cycles of the hammer, there was no longer any resistance against between them. There now is almost a mirror finish on the insides of each. I used gun scrubber to blow the remainder of the compound out of the action.
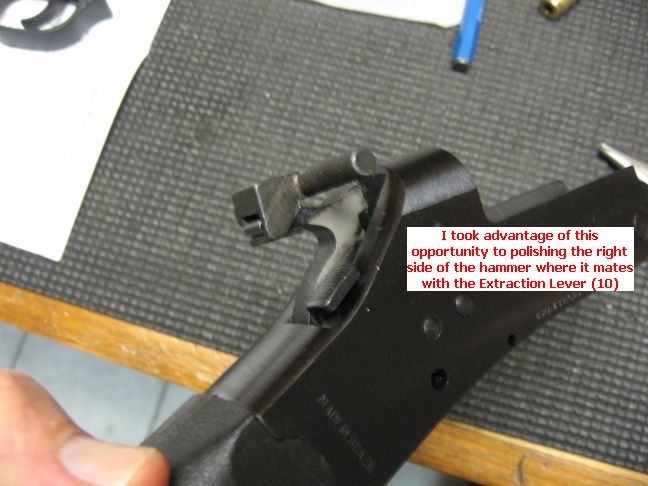
The previous picture shows that the side of the hammer was very flat but on the following picture you will notice that the wear is not so even on the Extraction Lever. I suspect the finish of the latter part was not as refined as the Hammer.
Doc A has just sent me some cast bullets so these will be loaded up for some testing of the bullets themselves and this work. I will report back.
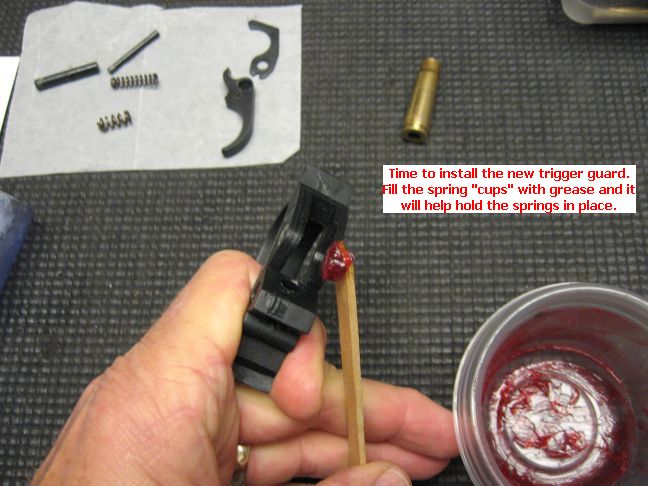
I prepped the spring cups in the new Guard with a quality grease. This will help hold the springs in place during assembly.
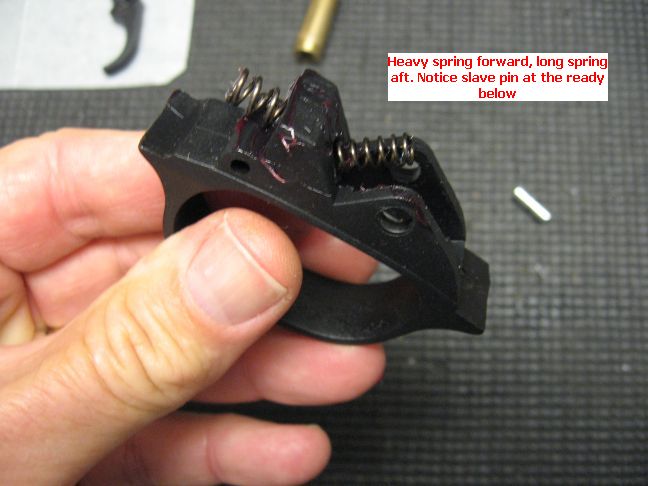
The short, heavy spring goes forward where it will react against the Locking Plate. The lighter, long spring is the trigger spring and faces aft.
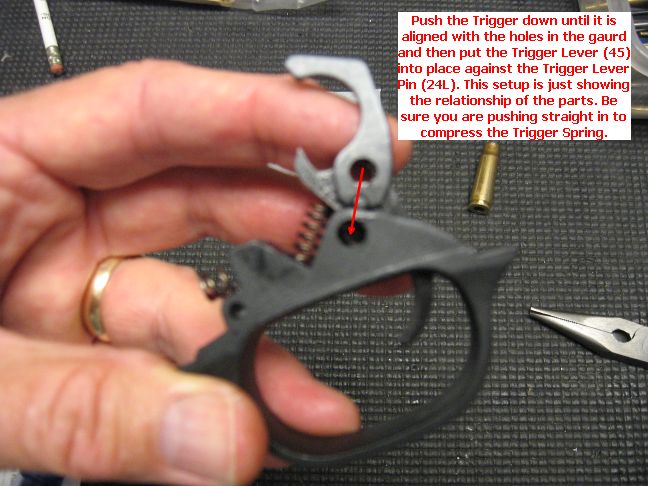
This next step is pretty easy to do. Just push the trigger (by itself) down flat against the Trigger Spring. Slip the slave pin through the right side of the Guard Assembly and partially through the Trigger. There is a slight recess or channel that the Trigger Lever fits along. Just slide it down until it comes to rest against the Trigger Lever Pin and then finish pushing the slave pin through the other side of the Guard Assembly. I had to hold the trigger slightly aft while I did this but could not do it with a camera.
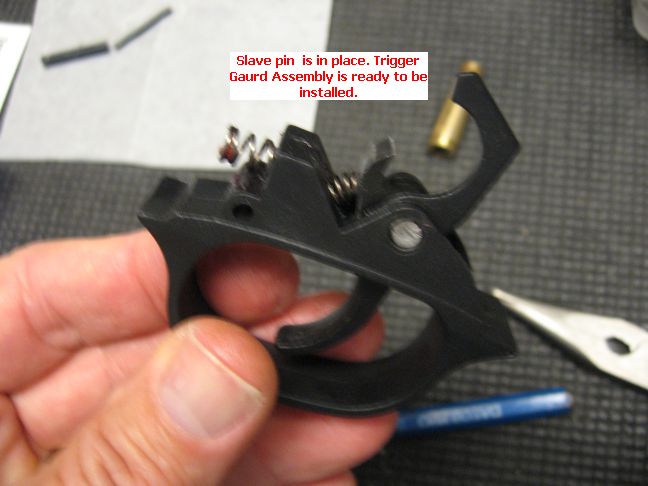
Here it is, everything is ready to go! Check the trigger function now. Make sure the Trigger Spring is doing it's thing!
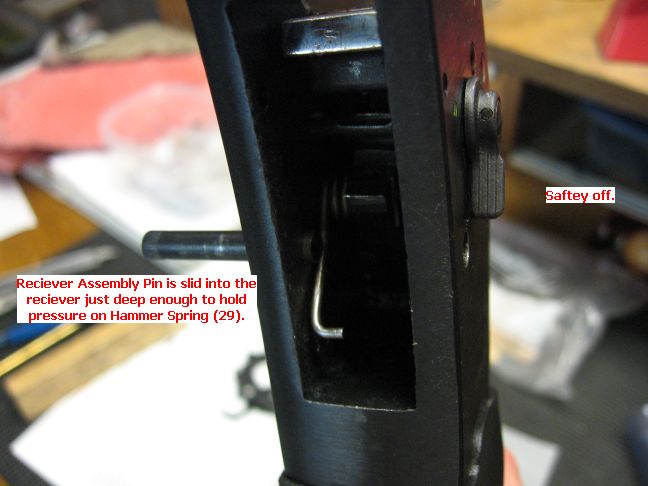
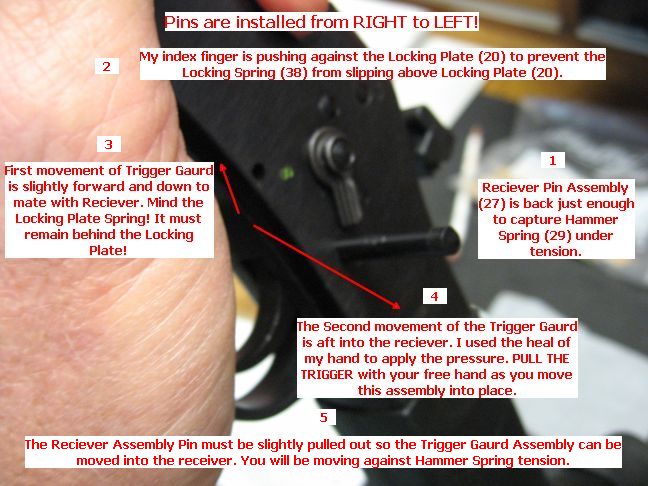
Before you get started with, push both the Trigger Guard and Receiver Assembly pins in to the RIGHT side of the receiver. The Trigger Guard Pin should be completely clear of the interior of the receiver. Pull the Hammer Spring slightly under tension and push the Receiver Assembly Pin in just enough to hold the spring under tension. This will start the spring winding aft as the Guard Assembly is moved into the receiver.
After a couple off false starts, I figured out that the Extraction Lever needs to be held up for the Guard Assembly to move into the receive. As the Assembly starts to fit in the receiver, the Lever wants to drop. I cured this by clamping it to the hammer spur and it was end of issue.
The next picture is busy but there is a lot going on right here. It took me about 10 to 15 minutes to figure it all out to make it a very easy movement.
Hold the receiver with your support hand so that you index finger can push against the Locking Plate. This will keep the Plate up so that the Locking Plate Screw doesn't slip over it. This is really the part that took me the longest to figure out and caused more false starts.
Carefully move the Guard assembly into it's forward position and then push down which causes a little aft movement so you need to insure that you keep the forward part of the Guard mated with the Receiver. Remember that you are winding the Hammer Spring a bit so there is pressure against the Guard Assembly.
Once it is in position, it you can hold the Assembly in with one hand around the Receiver and start the Trigger Guard Pin (forward pin) into place. Start the Receiver Assembly Pin in place. With everything lined up you can balance and secure the pins in place. The slave pin will fall right out as the Assembly Pin moves into position.
Last thing is to check your work through function of Hammer, Trigger, and Safety.
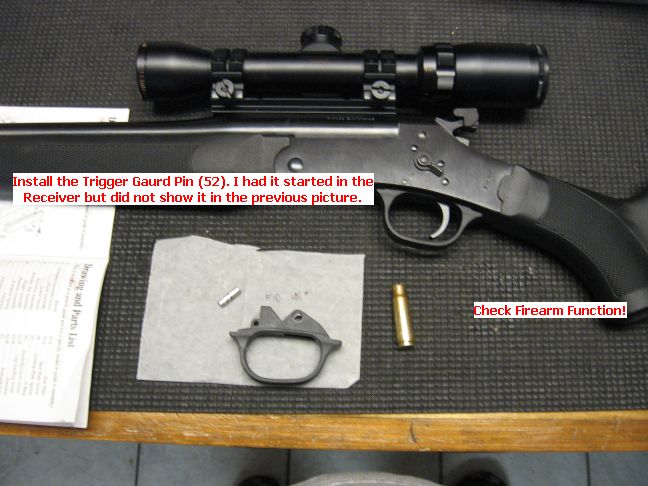
I will report back on the light primmer strikes with my reloads. Durn if this isn't a nice looking Single Shot with a new Trigger Guard!


